

In this document I am going to explain how to connect your local network with your Azure data center. This is what we called site to site connection in azure. You can create connectivity through the azure portal.
First of all I will explain the Topology of my site to site connectivity.
First of all I will explain the Topology of my site to site connectivity.

In here my on-premises data center private IP is on 192.168.xx.0/24 range. On-premises data center is having firewall and static public IP with better internet bandwidth.
From the beginning I will create azure resource group for this example project and will create azure services and servers inside resource group accordingly.
Create resource group
First you need to create resource group. I have created my one name as sd-sitetosite-rg region is West US 2 since that will be a cheap one for our test.

Create Azure Virtual Network(VNET)
- Click all services on left pane
- And search “VNET”
- Click the “Virtual Network”

VNET Parameters:
- Vnet name: sd-xyzcompany-vnet
- Address space: 10.1.0.0/16 (Make sure that the address space that you specify does not overlap with the address space for your on-premises network)
- Subscription: select your subscription
- Resource group: select the resource group we have created before (sd-sitetoste-rg)
- Location: West US2
- Subnet Name: keep it as default subnet or either you can name it on production/testing or staging
- Address range: here add your subnet address range. I added my Azure DC production server range 10.1.27.0/24
Make your other settings default and click “Create”

You can see the created virtual network service in Azure like this:

Create virtual machine for testing
- Go to all service and search “windows server”
- Click windows server 2016 data center
- Select our test environment subscription and resource group

Virtual Machine name: sd-localapp-vm
- Reigon: West US2
- Availability Option: no redundancy required
- Image: windows server 2016 Datacenter
- Size: DS1 V2 (this is cheap VM size for our requirement)
Give proper username and password

Click Next to add Disk settings
- OS Disk Type: Standerd SSD

Click Next to add network settings
In networking section, you can choose network settings we previously created
- Virtual Network: sd-xyzcompany-vnet
- Subnet: default
- Public IP: no (we don’t assign public IP for this VM since this is locally available production server)

Let’s make management settings as per bellow screenshot, since we don’t need to monitor or diagnose this test VM

Once validation passed. You can create virtual machine.

Once deployment is success you can see bellow message

Check your resources available:
Once your deployment success you can see the services deployed in your resource group
Go to resource group and view those.

Create VNET gateway
Go to all services and search vnet gateway
Select “virtual network gateway” published by Microsoft
When working with gateway subnets, avoid associating a network security group (NSG) to the gateway subnet. Associating a network security group to this subnet may cause your VPN gateway to stop functioning as expected

VNET gateway parameters:
- Name: sd-xyzcompany-gw
- Gateway type: Select VPN (VPN gateways use the virtual network gateway type VPN)
- VPN type: Select the Route-based VPN type
- SKU: Select the gateway SKU from the dropdown. The SKUs listed in the dropdown depend on the VPN type you select.
- Only select Enable active-active mode if you are creating an active-active gateway configuration. Otherwise, leave this setting unselected.
- Virtual network: select the Vnet you created before sd-xyzcompany-vnet
- Gateway subnet address range: choose the gateway subnet as 10.1.2.0/24 range
- Public IP address: This setting specifies the public IP address object that gets associated to the VPN gateway. The public IP address is dynamically assigned to this object when the VPN gateway is created. VPN Gateway currently only supports Dynamic Public IP address allocation. However, this does not mean that the IP address changes after it has been assigned to your VPN gateway. The only time the Public IP address changes is when the gateway is deleted and re-created. It doesn't change across resizing, resetting, or other internal maintenance/upgrades of your VPN gateway.
Leave Create new selected.
In the text box, type a Name (gw-ip) for your public IP address.

Deployment success for virtual network gateway

Create Local network gateway
Click all services on left pane and search local network gateway
Select Local network gateway published by Microsoft and click create

On the Create local network gateway page, specify the values for your local network gateway.
- Name: sd-myoffice-lgw
- IP address: This is the public IP address of the VPN device (on premises) that you want Azure to connect to. Specify a valid public IP address.
- Address Space refers to the address ranges for the network that this local network represents. In my local network VLAN is 192.168.251.0/24
- Configure BGP settings: Use only when configuring BGP. Otherwise, don't select this.
- Subscription: select your subscription
- Resource Group: select the resource group we created for this lab
- Location: West US 2
When you have finished specifying the values, click the Create button at the bottom of the page to create the local network gateway.

Local network gateway is deployed successfully

Now you can see many services in sd-sitetosite-rg resource group

Create a connection in local network gateway
Select the sd-myoffice-lgw local network gateway and navigate to “Connection” button in left page to create new connection for our site to site connectivity.

Create Connection
On the Add connection page, configure the values for your connection.
- Name: xyzofficeconn
- Connection type: Select Site-to-site(IPSec).
- Virtual network gateway: The value is fixed because you are connecting from this gateway.
- Local network gateway: Click Choose a local network gateway and select the local network gateway that you want to use. I used sd-myoffice-lgw
- Shared Key: the value here must match the value that you are using for your local on-premises VPN device or firewall. The example uses 'xyzcompany', but you can (and should) use something more complex. The important thing is that the value you specify here must be the same value that you specify when configuring your VPN device/firewall.
The remaining values for Subscription, Resource Group, and Location are fixed.
Click OK to create your connection. You'll see Creating Connection flash on the screen.
You can view the connection in the Connections page of the virtual network gateway. The Status will go from Unknown to Connecting, and then to Succeeded.

You can see new connection has created under local network gateway

Click the connection and go to overview. From there you can download the VPN device/firewall configuration file

Note: Here I am going to used different firewall which is not CISCO or Fortinet. So I am downloading Generic firewall settings

When you open downloaded configuration file its shows like this. Here you can find relevant information for your firewall VPN settings

Here is my primary firewall VPN settings page. I am going to add my Azure data center information to VPN profile and create IPSec VPN tunnel to azure data center
- Local IP: select the range of local IP you want to communicate with Azure data center
- Next hop: default
- Remote host: Azure gateway public IP. You can find this ip on network gateway overview.
- Remote IP: azure VNET default IP range which we have created our datacenter VM on this IP range
- IKE Protocol: IKEv2
- Auth Type: PSK
- Preshared Key: xyzcompany

In Proposal tab you need to add IKE configuration settings which you can find from the downloaded VPN configuration file

Once you add everything success you can see this raw on your VPN profile page

After few second Azure local gateway connection will be updated “Connecting” to “Connected”

Test the connectivity
Find out the Azure production VM local IP. my VM ip is 10.1.27.4

In network security group you should allow RDP port to remote to this server. Add new rule to allow RDP port in network security group on your production VNET

Remote to Azure production server private IP form your local network
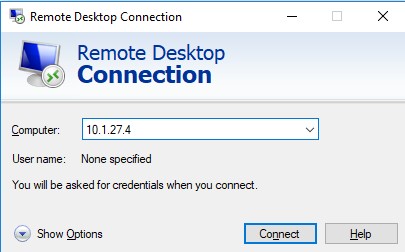
Connection is success. You are able to remote

Server’s network settings bellow:

I hope this document will helpful you to extend your local data center with Microsoft Azure cloud. there are many features to scale up and scale out your data center.
Please feel free to ask any question about issues and other related queries about site to site connectivity on azure.
Thanks,
Sachindra Devanarayana


Pretty great, configured my network.
ReplyDeleteConnecting a local network to an Azure Data Center through Azure Site to Site is an incredibly useful tool for businesses. It provides a secure and reliable way to connect local networks to the cloud, allowing for data to be quickly and easily shared within a secure environment.tech info This makes it easy for businesses to access and share their data, no matter where they are in the world. Highly recommended for businesses looking to make the most of their resources.
ReplyDelete